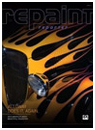
A slight change of direction was made from the original pearl orange rendering by Steve Stanford.
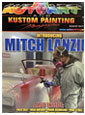
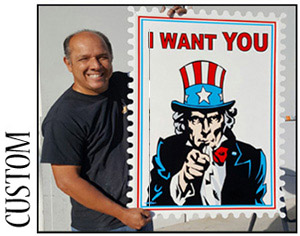
Musician and custom painter Mitch Lanzini holds a G&L Legacy guitar that has and ice pearl metallic finish complete with a 14-karat engine-turned gold leaf graphics by pinstripper Dennis Ricklets.
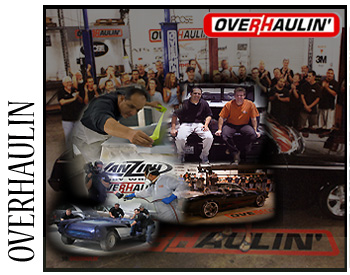
Preparation for paint is perhaps one of the most difficult stages of a hot rod build, but once the color has been selected and the primer blocked to perfection, things begin to move rather quickly. Mitch Lanzini of Lanzini Body Works in Huntington Beach, California, has been one of the key players of TLC's popular television show "Overhaulin'," having painted over 25 cars in the five seasons that the show has been on the air.
The show's time constraints don't leave much room for error when the cameras are rolling and the producer is worried about his deadline. During Mitch's 16 years in the business he has painted everything from collectible Ferraris to Volkswagen Beatles, including Rod Millen's Pike's Peak Hillclimb cars and Jimmy Johnson's off-road racer before he was a NASCAR champion. Mitch is also a hot rod owner and vintage car lover who built his own '32 Ford roadster highboy.
The custom cars and trucks that have been created for the television show have provided Mitch with some invaluable lessons about time management and how much can be accomplished in a short period without sacrificing quality or jeopardizing the integrity of the manufacturer's paint products.
At this writing Mitch is in the homestretch of the build of his '33 Ford Speedstar Coupe. This stylish coupe will be a rolling business card and the paint preparation much be the best Mitch and his experienced crew can achieve in his Huntington Beach shop. There were approximately 300 hours of sanding, priming and surfacing involved even before the first coat of color was applied. The World of RODS entered at the point where the first coats of color were being applied in the paint booth. We'll show readers some of the important steps Lanzini and his crew took to ensure a superior paint finish, one that was accomplished in a 24-hour, non-stop workday. There was literally no down-time or hour-long breaks from start to finish. The work was continuous last July when the Southern California weather was warm and dry.
Here's some background: the coupe actually sat for several years as Mitch and his wife Tara considered numerous color choices. Mitch first painted the grille shell, installed the insert and evaluated the color every day for two months to make certain this was finally the color choice they could live with for years to come. Once the color was selected and finally approved, it turned out to be a cocktail of two colors combined to achieve a bright and bold hue that was appropriate for the hot rod of a body shop owner, a painter and a guitar player.
Because Mitch has been playing guitar for decades and performs regularly in a blues band, he feels the color choice for his hot rod ride was appropriate for his personality and profession. The fit and finish and attention to detail in the finished coupe will soon be in harmony with the high quality of the paint. the finished Speedstar couple will be one that naturally attracts a good deal of industry attention and demonstrates what can be done for any Lanzini customer who demands the best in automotive paint finishes. We hope to show readers the finished coupe in the near future.
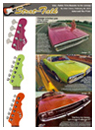
These G&L prototype guitars are painted with automotive finishes in hot rod colors. The limited edition models are planned for the 2009 model year and will be on display at the NAMM show, the musical equivalent of SEMA.
Mitch sprayed these preliminary color choices for evaluation. A period of decision and a final commitment is important because once the paint is on it's too difficult, expensive and wasteful to change. Mitch encourages customers to look at a large samples of the color they want (on a curved surface) to see how the color looks in direct and indirect sunlight. Just because you saw it on a BMW doesn't mean it will look good on your hot rod.
The floor pan is often overlooked, but turning the body on its side will allow the bottom to look as good as the top. Here Walt applies sealer to the floor pan before the first coat of color is sprayed.
Now the clear is applied to the floor, and we get a chance to see what the top color will look like finished. A little drying time and a look at the color outside can be helpful. Mitch color sanded and buffed the floor pan, and then masked it to prevent any overspray from reaching the top when the upper panels are sprayed.
A BASF tool has 3,000 color chips painted with automotive paint - each has its own formula, and there are subtle differences to each one. Mitch has used the color chips to make a preliminary choice to see how two colors will look together. He also gets a precise formula to match an existing color.
The first color coat is applied over the sealer. The bottom of the body offers a chance to look at the color over a large area. If you have to make adjustments, now is the time to make them because you won't see the top and bottom at the same time. It's easier to redo the bottom than every single piece of the top panels.
Walt found a spot that wasn't finished to his satisfaction. The body is in the spray booth, but there's still time to pay attention to a minor imperfection that might have been overlooked. Paint will not hide an imperfection, even in a door jamb where few will see it. The highest level of attention to detail will secure the best paint job.
This fixture was designed to allow the hood and hood sides to be painted next to the body to ensure even, accurate color coverage between all top body panels. This is extremely important when painting metallic and pearl paints, even the spay pattern form one panel to another can cause a minor variation in color.
Another last minute detail is the hood release rod opening that passes through the cowl. Mitch opens it with a rat-tail file to de-burr the hole and make it more uniform.
Like any recipe, accurate measuring is important for best results. Paint is a chemical that needs the most accurate measurements to mix properly, and following the manufacturer's instructions is best for consistently superior results. Quality materials from one manufacturer's system, and of course, following the precise guidelines of mixing and applying paint, builds confidence and peace of mind that the paint performance meets the standards required for the manufacturer's warranty.
The LED taillight was permanently mounted to the body and blocked to perfection in conjunction with eh body surface. The lens will not receive color during the application of the color topcoat. But, the lens will be coated with clear (with the rest of the car) at the final stage to maintain a continuous surface from body to lens. The clear chemically adheres to the plastic lens because of solvents in the paint.
The final masking job goes all the way to the floor. Every opening is closed and ensures that Mitch and Walt can put paint on the surfaces where they want it and prevent paint from reaching where they don't want paint or overspray.
Almost as important as blocking and sanding is the masking phase. Using quality materials is important to the success of the paint job. Tape that stays put and paper that hold back the solvents are important. Poor quality tape and paper can add to the smallest pieces of visible debris and dust that can compromise your paint's surface.
Mitch mixed a compatible yellow with the translucent pearl color to create a tined basecoat that was a close to the topcoat pearl color as possible. This was done to improve the overall consistency of the color and help pearl cover with fewer overall coats.
A clean surface is paramount to ultimate success. No potential contaminant is allowed to reach the surface from a cloth shop towel or even from the oil on your hand. Gloves are a must and using wax and grease remover is very important, but keeping the surface as clean as possible will help prevent headaches and imperfection later. Mitch and Walt Pearson make their final preparation before the doors to the paint booth are closed.
Mitch likes the aerosol RM Aero-Max because it allows him to clean a reasonably sized area before the solvent evaporates.
The SADA treated nylon paint suits are lint free and designed to repel dust. Mitch and Walt wore brand new suits - no corners were cut. Gloves and professional respirators are obviously a must as well. All of the intake and exhaust filters were replaced and the walls and floors were prepped to the maximum. Even the paint booth lights were cleaned. Mitch has learned through "Overhaulin'" that two guns are better than one, when experienced painters work together, time is saved as well.
Mitch and Walt apply the tinted basecoat before the pearl is added. This is where the "rubber meets the road" and you can tell what the surface preparation really looks like, especially around the reveals.
Pearl has been applied to every panel at this point. a clear basecoat seals the pearl. The basecoat dries quickly and allows you to handle and clean the parts without affecting the color coat. Notice how the fixture allows the painters to apply the pearl to all panels evenly. The doors and hood panels are in close proximity to the body and the deck lid has been installed as well.
Mitch evens out the pearl over the clear basecoat to make certain the color and text rues are consistent and even. Highly translucent candies and pearls are extremely difficult to coat uniformly without the panels almost as one. A few passes around the car are all that's required for this step. then another coat of basecoat clear was added on top. At his point, it was time to take all of the panels apart again and clearcoat them individually.
Mitch prefers to clearcoat all of the panels separately to prevent tape lines and seams inside the jambs.
Before the trunk lid was removed for the final clearcoat, notice the consistent gap spaces around the trunk. The taillight has been uncovered in preparation for the final clearcoat that will create a seamless surface from the body to the lens material.
The last coat of clear was applied around the end of the 24-hour period of continuous work. Walt and Mitch have been away and working during the entire process, both agree the payoff was worth the extra effort and sleepless nights. Lack of sleep is nothing new at Lanzini's shop, but this "Overhaulin'" was for Mitch and Tara Lanzini's rolling business card that you'll see as soon as the Speedstar high-boy is finally completed.
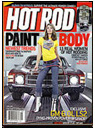
by Grant Peterson May, 2006
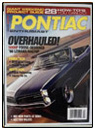
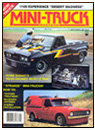
Gone are the days of the hay-hauling, tire-mauling, flog-it-till-it's-dead shop trucks. If you're going to make a statement with your company vehicle, make sure you are heard loud and seen big! After all, Oscar Meyer has the Weiner mobile, Batman has the Batmobile, and Mothers (the polish/wax/cleaner people) has the coolest El Camino rolling down the streets of Southern California.
Do too many cooks really spoil the soup? Well, maybe in your kitchen they do, but in Mothers' kitchen these cooks had their eye on the same main course. It was only through the collaborative efforts of the Mothers' crew that the El Camino took shape from concept to reality. These gents are more than just chemists with Bunsen burners and boiling beakers, all of Mothers' children are real life, down-to-earth, gear-grinding go-fast fanatics. These guys understand that a car can look pretty and polished just sitting there, but there is nothing quite so beautiful than that same work of art going fast.
The need for speed drove the gearheads at Mothers to choose a monster-sized 572 Chevy crate engine and 4L80E trans to throw in the pot for that needed giddy up. There is nothing small about this '67 Elky; from its high-horse Rat to the monster-sized 36-gallon fuel cell, to the one-off 20- and 22-inch Billet Specialties wheels and matching steering wheel, all of which adds to the Elky's large and in charge stance.
This El Camino is a big bite to swallow--in a good way and it didn't come about by accident. Chip Foose was consulted and threw some super slick ideas onto the drawing board; the colors and the way they flow from inside to out were all part of Chip's vision. Mr. Foose's ideas were put into reality by Five Axis Body & Paint and Lanzini Body Works in Huntington Beach, California. Carlos, of Stitchcraft in Westminster, California, turned the interior concepts into a reality and laid it all out in the finest red and black Katzkin leather to grace the cockpit of such a creation.
The underbelly of the '67 is as well thought out as its slippery exterior, thanks to the guys at Streetwise in Rancho Santa Margarita, California. Take a crawl under the California-rake and the first thing that grabs the eye is the sexy-looking rearend. Doug Nagy and Johnny Omondson are no strangers to performance and pushing the limits of any vehicle and their contributions to the Mothers El Camino< are no different. Using Speedway Engineering quick-change gears, they built the all-business rearend that's surrounded by their billet control arms. Hotchkis upper control arms are found up front as well as their swaybars at each end along with QA1 coilover shocks and giant-sized Baer Brake 13-inch rotors.
Taking in all the pertinent information that makes up this often over-looked body style, might need some time to digest as we all get closer to thinking outside the pickup box.
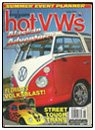
Volkswagen's have never played center stage in Overhaulin', the well-known TV show created in 2004, but a long-awaited change recently
occurred as host Chip Foose decided to wrench on a Split Window bus. Here is the awesome result!
BY STEPHAN SZANTAI
From Monster Garage's furious Split Window to Pinks' drag Bug, air-cooled VWs have had the favor of TV producers in recent times.
Another show can now be added to the list -- Overhaulin'. The premise of the show revolves around a team of talented builders, who gut, refurbish, modify and paint a tired classic car (all in a week!), unknown to its owner. Obtaining the said vehicle is usually achieved through some trickery, such as pretending it has been stolen or impounded. Family and friends serve as accomplices, thereby making the prank appear more authentic.
The host of the show is the gifted Chip Foose, an honor alumnus of the famous Pasadena Art Center College of Design. A Hot Rod Hall of
Fame inductee, he now operates Foose Design, a company specializing in illustration, graphics, and complete construction of project cars and other automotive related products.
-- Text under photo --
TOP, The Overhaulin'project started with a '65 bus, property of Fred Waugaman, a.k.a. Hot Dog Fred. Here, Chip moves the turn signals
underneath the headlights. ABOVE, before work began, Chip made this quick sketch. Around are "before" pictures.
--Page 47
--Text for Top two and Middle photos --
FAR LEFT, team members Mark DePew, Pete Skiba, and Paul Lozzio study the gearbox supplied by Buggyworld. LEFT, both of the bumpers were heavily modified, evident by the wide notches. BELOW, just three days after the build began, Lanzini Body Works took delivery of the rolling shell.
--Text for Bottom 4 photos
Photo 1 -- Lanny Hussey (left) flew from Canada for a day to help Geoff Peterson (right) with the 1915cc engine assembly.
Photo 2 -- Laurie Peterson (left, with show co-host Chris Jacobs), the brother of Geoff Peterson, closed his "Canada Customs & Hot Rods" shop
for a week to join the Overhaulin' crew.
Photo 3 -- Drawing of the custom, one-off exhaust system built by Manuel "Tiger" Vasquez of A-1 Muffler. It uses a single Sidewinder-style
muffler with dual tips.
Photo 4 -- Pete Skiba modifies the studs of the Airkewld disc brake kit to fit the wheels.
-- Page text
The team of Overhaulin', which incidentally airs on TLC in the United States, traditionally wrenches on a wide variety of domestic
cars. Ford Mustang, classic Ford F100 truck, boxy '70s Chevy van -- you name it, it has likely been revamped by the Foose crew. Yet, the new season -- the fifth -- has a great surprise waiting for all VS nuts: a build based on a 1965 Deluxe! Chip had been interested in working on a
Volkswagen for quite some time, but for one reason or another, the project never came to fruition. The situation changed recently when Tod
Mesirow, the new Executive Producer and former producer of Monster Garage, came into the picture!
Tod contacted Randy Carlson, one of the builders of the Monster Garage Split Window, as seen in our October 2005 issue. Randy brainstormed a list of people, who could potentially become victims of the Overhaulin' prankster, with the crew ultimately settling of Fred
Waugaman. Known as "Hot Dog Fred" in the Volkswagen community, he is often found at numberous VEE Dub events on the West Coast, supplying tasteful hot dogs and bratwurst to the crowd. "Fred is a top notch guy," comments Carlson. "He's a friend to everyone and the perfect target for the show." A good pal of Waugaman, VW gearhead/artist Tim Leventry, later played the role of the "accomplice" thus insuring the deception would work flawlessly.
Revealing all the show's secrets and the details of the hoax in particular might take away part of the excitement of watching the episode on TV! So lets just say that the prank ran around the idea of renting Fred's Deluxe for a Volkswagen of America commercial. In this scheme, he was supposed to receive the hefty sum of 5,000; but the bogus producer of the ad suddenly backed out when discovering the unrestored bus. Arguments and breaking a couple of side windows (!) on the vehicle ensued before Chip Foose came into the action. "I was stunned for a
moment," adds Fred. "I had seen Overhaulin' and could not believe it was true. How many of us have watched shows like this and think 'what a lucky guy!"
--Page 48
While Overhaulin', uses a recurring cast for each and every show, producers occasionally invite a few guest to help with the work.
In the case of the bus build, they included the following: Mark DePew of Wolfburg West (his amazing knowledge of the Type 2s was an immense
help), custom VW builder Paul Iozzio, Geoff and Laurie Peterson of Canada Customs & Hot Rods (we featured Geoff's Hebmuller rod in our
February 2007 issue), along with Pete Skiba of Airkewld.
Originally, each team member signs for a specific job; but in the end, everybody ends up helping throughout the entire construction
process on very different tasks -- with little sleep. "The build takes seven days and on the eighth, the car is given back to its owner," explains Geoff Peterson. "My brother Laurie and I worked every day, a total of 150+ hours with a cold energy drink always within arm's reach!"
Thankfully, Fred's Deluxe proved to be in good shape, even though it looked a bit worn out at first glance. Chip's idea behind the
project toyed with the following idea -- What if Volkswagen had built a prototype show bus for the 1966 model year? The result might have been
what you see on these pages. We made a point of listing the
--Text for photos
Photo 1 -- Chip Foose draws the final rendition of the bus.
Photo 2 -- The last two days were very hectic with several people
working in and around the vehicle at the same time.
Photo 3 -- Chip enthusiastically participated in the build. He's seen
here putting the final touch on the side moldings.
Photo 4 -- The last staff meeting with Chip.
Photo 5 -- Dennis Ricklefs did an incredible job with the wheels and
body pinstripes.
Photo 6 -- The team
Photo 7 Here is the final rendering. Notice the lower notch in the front bumper.
--Page 49
modifications Foose envisioned elsewhere in this article. Some, such as the relocated side moldings are obvious; others, like the reshaped "dog
legs" under the front doors could easily be unnoticed by even the hard- core Type 2 guys. Sure, not all alterations will please the VW crowd,
but keep in mind that they come from a talented designer specializing in custom cars rather than just Volkswagens. From Day 1, Chip always kept an ear open, ready for the crew's input, and the result is a beautifully finished vehicle that will leave its mark on our hobby.
With the bus now finished, some components unfortunately remain hidden from view, starting with the adjustable suspension (with Wagenswest beam) and four disc brake kits, offered by Airkewld. Buggyworld supplied the fresh gearbox to which bolts a 1915cc engine --
Fred won it at a raffle a few years ago! Vee Dub Parts Unlimited gave away countless components to make sure it would run properly, while
Lanny Hussey flew from Canada for a day
--Text for photos
Photo 1 -- A set of 16-inch "domestic" rims with VW hubcaps equip Fred's cruiser.
Photo 2 -- While the front bumper was notched at the bottom, the rear bumper was notched at the top to clear the modified engine lid -- nice
mods!
Photo 3 -- Fred patiently waits to see his freshly completed Deluxe.
Photo 4 -- Check out the side rockers and chrome pop-outs.
Photo 5 -- a happy Fred Waugaman now enjoys his overhauled bus with his wife, Debie.
Photo 6 -- Artist and gearhead Tim Leventry was one of the "insider guys" who helped this project car come to life. Photo 7 -- Interior
retains its vintage feel. Numerous speakers are hidden all over the place! Most alterations are very subtle, including the two additional skylight windows.
-- Page 110 -- Continued from page 49
in order to bring a varitey of LanD products for that motor. WolfsburgWest offered a staggering number of top-notch restoration parts as well,
but we should not forget to mention a handful of companies that made Chip's vision a reality: Wolfgang International, Econo Int'l supply, and
A-1 Muffler. Finally, let's give two thumbs up to some other non-VW- related partners, specifically Lanzini body works, Yoyi's (interior),
Arc Audio, Stockton Wheels, 3M and Artistic Silver Plating.
Fred was stunned and ecstatic when the Overhaulin' team finally unveiled the vehicle in front of the cameras. The week prior had
obviously been stressful, as he had no idea what Chip had in mind. "The bus is a pleasure to drive," says Fred who declares being very satisfied
with the final result. And like all the VW guest builders, he wants to point out how much he enjoyed dealing with Chip Foose, "a great guy, very easy to approach and to talk to." The date of Overhaulin's bus episode has not been confirmed yet, even though it will likely air in
May or June. Check out your TV listing or log-on to (www.overhaulin.com) for additional information.
THE LIST OF MODIFICATIONS ENVISIONED BY CHIP:
- Bumpers installed closer to the body
- Lower section of the front bumper notched, `a-la New Beetle
- Rear bumper raised and with deal exhaust cutouts
- Upper section of the rear bumper notched to clear the engine lid with
rounded counters
- Tab removed on each chrome headlight ring
- Lowered front turn signals
- Redesigned "dog legs" (under front doors)
- Shaved drip rails
- Peaked front visor
- Custom-made side mirror arms
- Side rockers
- Lowered Deluxe side moldings
- Two additional skylight windows
- Early Bus taillights (shape matches the radius of tailpipes, bumpers,
engine lid)
- Rims with "domestic" bolt pattern and custom hubcaps
- Chrome pop-out windows and front/rear Safari windows
* Radio opening filled w/original louvers